
Neon provides serverless Postgres databases that offer a generous free tier as well as other features such as autoscaling, bottomless storage, and branching. As such, Neon is an excellent choice as a database provider for serverless applications.
We are happy to announce that genezio now has full support for integrating with Neon Postgres. The integration allows you to easily create a Postgres database which you can manage directly from your genezio dashboard.
Achieving more with Neon and genezio
Among the many features unlocked by this integration, Neon Postgres allows you to:
Branch your data for production, development, testing, and other purposes. This enables you to efficiently change between different environments as well as setting up continuous integration and delivery pipelines.
Integrate with GitHub actions so that your database can stay up to date to any environment you are using. Genezio also supports staging environments so that you may fully utilize the branching feature provided by Neon.
Use vector databases using the
pgvectorextension. You can find a ChatBot application that uses this concept here .Neon Pro Plan users also have access to autoscaling.
All these features are optimized for applications that are based on a serverless infrastructure. As such, genezio’s serverless deployment is well-suited for working with any Neon Postgres database.
Connect your backend to Neon Postgres
In this tutorial, you will learn how to create a simple genezio project and integrate it with a Postgres database using Neon.
Prerequisites
You need to have nodejs and npm installed. If you need any help with the installation, you can head over to their documentation for more information.
Step 1: Create a new genezio project
If you already have a genezio project deployed and you just want to integrate Neon with it, you can skip to step 2: Initialize a Neon Postgres database.
Install genezio by running the following command in your terminal:
npm install genezio -g
After that, you can initialize a brand new project by running genezio in your preferred directory:
genezio create backend --backend=ts --name=getting-started-with-neon --region=us-east-1
Step 2: Initialize a Neon Postgres database
The next step is to integrate this small project with a Postgres database provided by Neon. To do that, we first need to deploy the project. We can do that by running the following commands in the root directory of the project:
genezio deploy
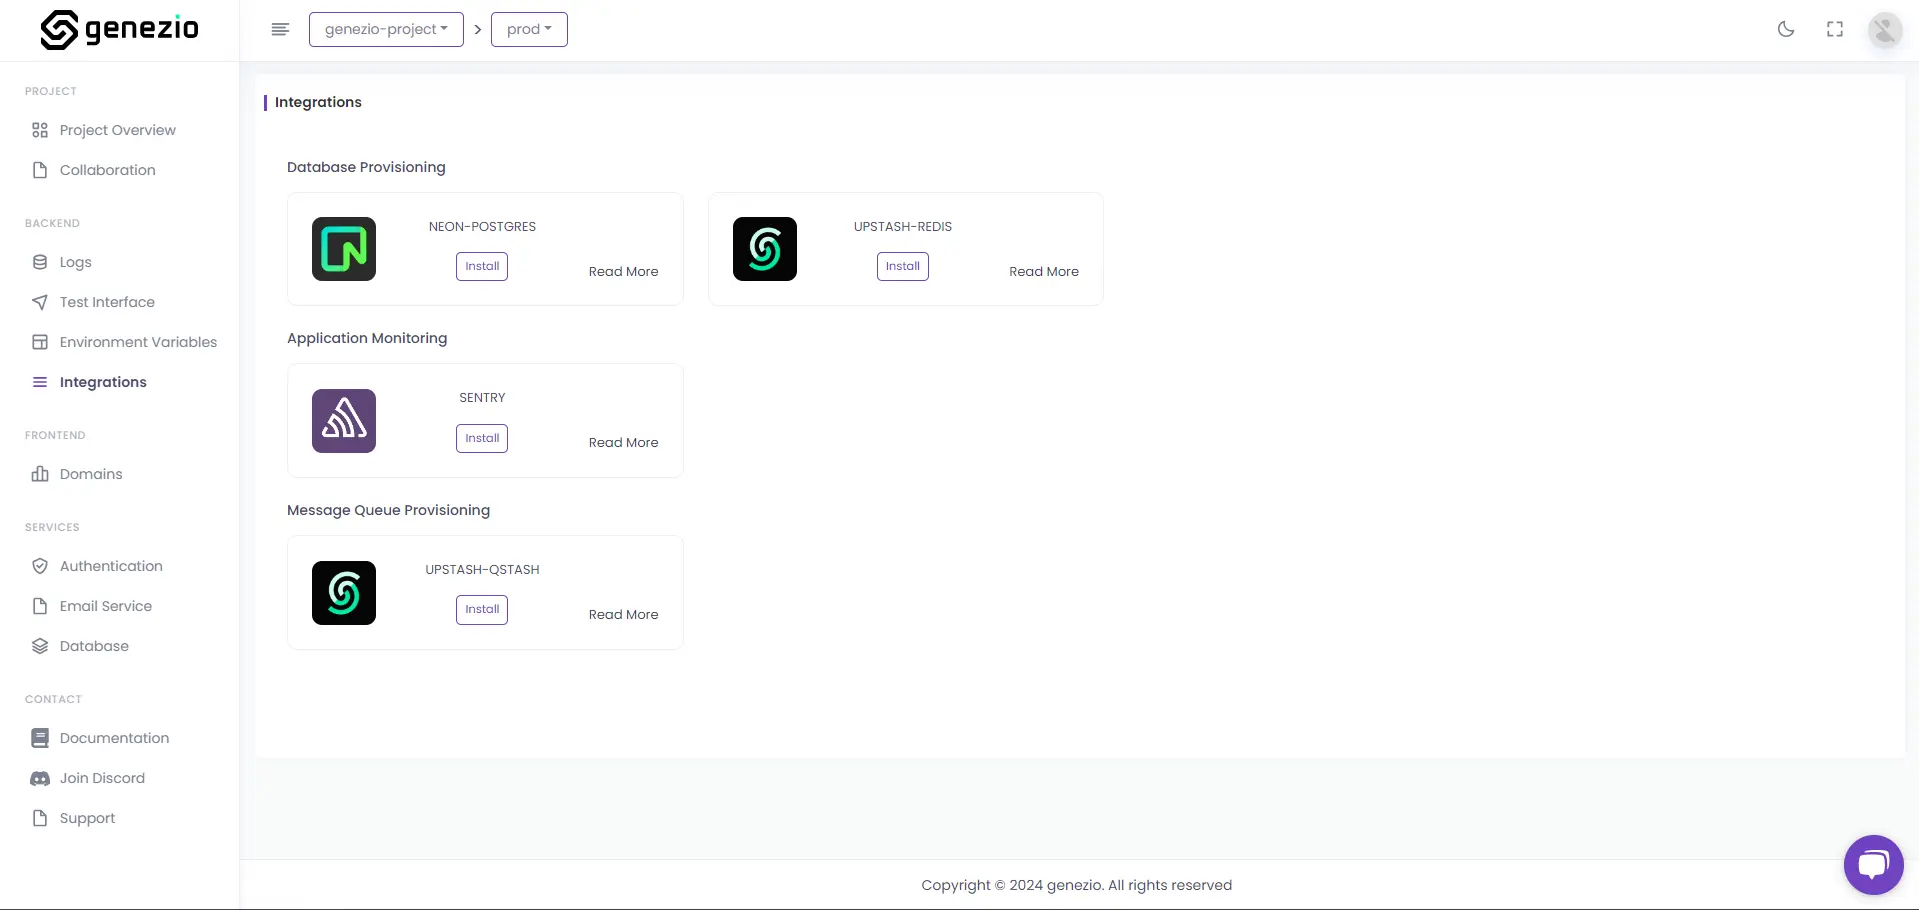
Once the deployment is complete, open your genezio dashboard and pick the project you created earlier. In the Integrations tab you can select to install the Neon Postgres integration:
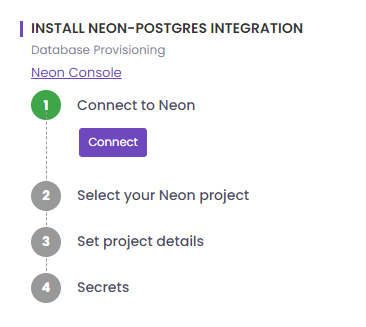
Connect with a Neon account, or if you don’t have one, create a new one by going to the Neon website:
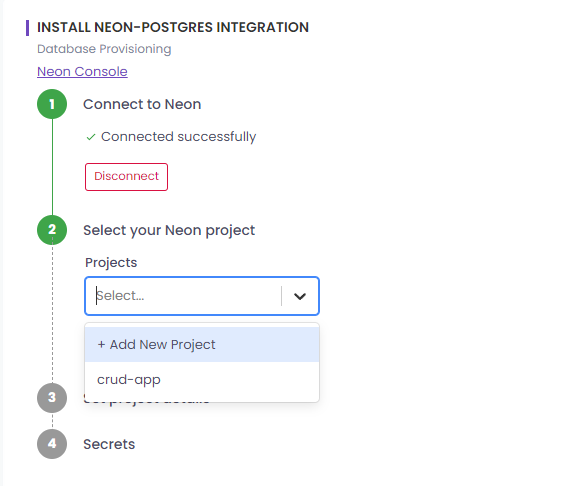
Create a new Neon Project called getting-started-neon or select an existing one:
Next, choose the project details:
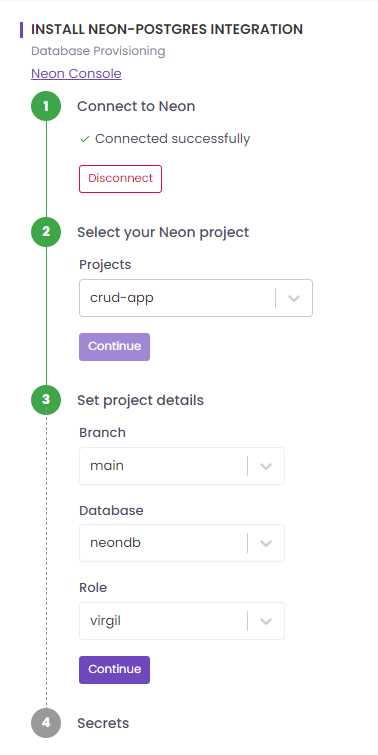
Finally, save the environment variable to your project so that you may use it when you want to connect to your database:
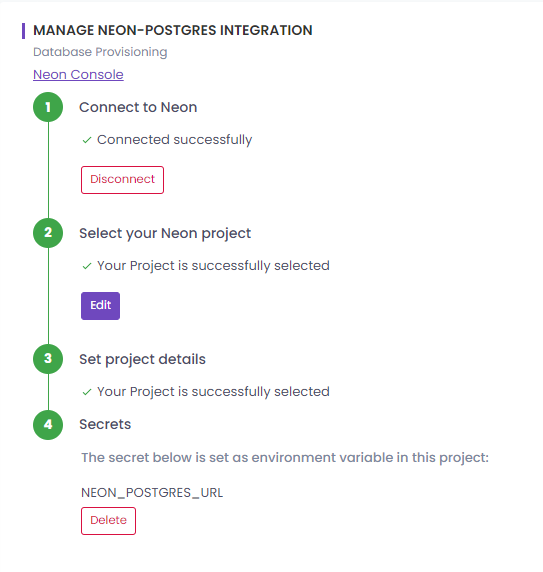
With all that done, your project is fully integrated with a free tier Neon Postgres database.
Step 3: Connect your backend to the Postgres database
Next, you will implement a simple Postgres service that will allow you to use your newly integrated database.
Create a new postgres.ts file in the root of your project. This file will contain a class that will have a constructor which will connect to your database using the NEON_POSTGRES_URL environment variable. This variable has already been set in your production environment so you don’t need a .env file when testing your deployed project from the genezio dashboard.
In the root of your project, run the following command:
npm install pg @types/pg @genezio/types
This package will allow you to use the pg module so that you can connect to your database from the NodeJs backend.
In the postgres.ts file, add the following code snippet:
postgres.ts

import { GenezioDeploy } from "@genezio/types";
import pg from "pg";
const { Pool } = pg;

@GenezioDeploy()
export class PostgresService {
  pool = new Pool({
    connectionString: process.env.NEON_POSTGRES_URL,
    ssl: true,
  });

  async insertUser(name: string): Promise<string> {
    await this.pool.query(
      "CREATE TABLE IF NOT EXISTS users (id serial PRIMARY KEY,name VARCHAR(255))"
    );

    await this.pool.query("INSERT INTO users (name) VALUES ($1)", [name]);
    const result = await this.pool.query("select * from users");

    return JSON.stringify(result.rows);
  }
}
With all that done, you now have a single method for inserting a user into a table and then retrieving all the users.
Step 4: Test your Postgres service
To locally test your Postgres service, you have to copy the environment variable NEON_POSTGRES_URL in a .env file in the root directory of your project. You can find this variable in the Integrations tab of your project page in the
genezio dashboard
:
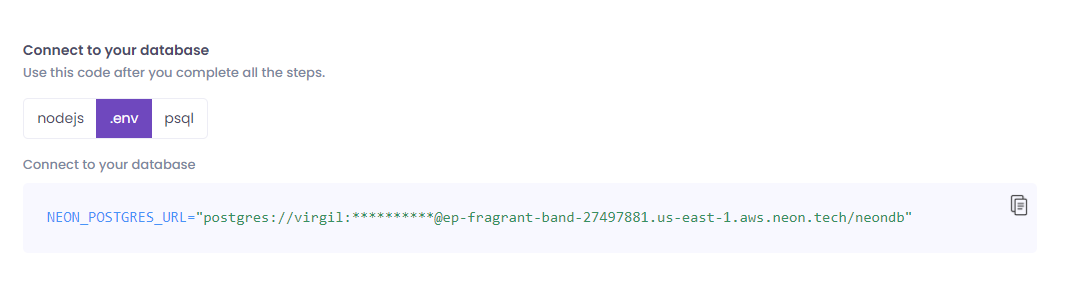
The .env file should look similar to the following snippet:
NEON_POSTGRES_URL="postgres://virgil:<your-password>@ep-fragrant-band-27497881.us-east-1.aws.neon.tech/neondb"
After setting the environment variable, you can test your Postgres service by running the following command in your terminal:
genezio local
Open the testing page in your browser by navigating to test interface .
Here you can send requests to your local backend server and receive appropriate responses to check if your service is working properly.
Step 5: Deploy your application
After testing your application locally, you can deploy it again to update the project by running the following command in the root directory of your project:
genezio deploy
Now you can manage your deployed application by navigating to the Genezio dashboard .
Conclusion
Congrats🥳! You successfully deployed a project that is fully integrated with a Neon Postgres database.
Subscribe to our newsletter
Genezio is a serverless platform for building full-stack web and mobile applications in a scalable and cost-efficient way.
Related articles


More from Tutorials