Seamless Web3 Authentication - Add MetaMask Login to Your App in a Few Clicks with Genezio

13 minutes read
Have you ever wondered what happens when you click that “Login with MetaMask” button on a web app? In today’s world, where security and user control over data are critical, leveraging crypto wallets like MetaMask for logins is becoming increasingly popular. But what goes on behind the scenes to make this seamless experience possible?
This article dives deep into the inner workings of logging in with MetaMask on your web app. We’ll break down the four-step process involved and explore how Genezio’s user-friendly authentication service handles the heavy lifting, allowing you to focus on building amazing features for your application.
MetaMask Login Explained
When the user clicks on ‘Login with MetaMask’, the flow goes like this:
- The web app will pop up MetaMask and ask the user to connect their wallet.
- The web app sends the public address of the wallet to the backend and asks for a nonce.
- Upon receiving the request, the server checks if the public address belongs to an existing user. If it doesn’t, it will create a new
userrow for that public address in the database. Once the nonce is returned, the user will be prompted to sign the nonce to prove they have control over that public address. - The signature and the public address are sent back to the server, which checks if the signature is correct. If so, an auth token is generated and returned to the web app. A new nonce will be generated for that user for the next time the user will want to login.
Don’t worry, you don’t have to handle all these things since the Genezio authentication service will do all the heavy lifting. Let’s move forward with developing an app that features MetaMask for signing in.
Implementation
Prerequisites
If you don’t already have them, you’ll need to install the following tools:
Note: I recommend you to use
nvm
to manage NodeJs and npm versions.
After installing nvm, you can easily get any version of node by running nvm install <node_version>.
nvm will automatically install the corresponding npm version.
Set up your project
Clone
this
repository and then navigate to typescript/metamask-auth.
In this folder, you already have a working application. You just have to configure a few things and in the following sections we will explain the code.
git clone https://github.com/Genez-io/genezio-examples
cd typescript/metamask-auth
Run genezio deploy to deploy the project in your genezio account. Now, let’s configure it.
Configure authentication
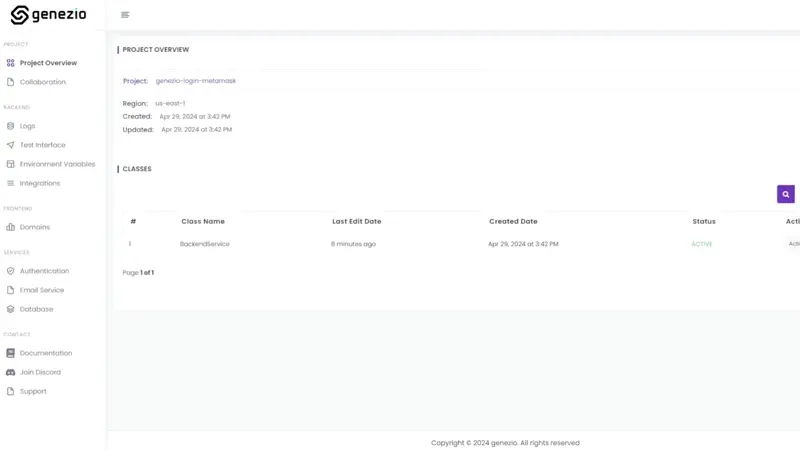
Go to the Genezio Dashboard, select your project, and navigate to the Authentication section in the sidebar to enable the feature. Follow the instructions on screen and create a Postgres database to store user and session information.
To enable Web3 login, go to Providers and toggle the enable button. Now, you have an authentication service that can perform the “Login with MetaMask” flow described in the previous section. We just have to implement the frontend.

Remember the “token” and “region” values as we are going to use them later.
Frontend implementation
To keep things short and focused, we will not cover the boring React stuff. Instead, we’ll jump straight to the point, explaining how to communicate with the Genezio Authentication Service.
Let’s start from the beginning. To interact with your authentication service, you need to install and import @genezio/auth and initialize the AuthService class.
Replace the <token> and <region> placeholders with the values from the Authentication section.
npm install @genezio/auth
client/src/App.tsx

import { AuthService } from "@genezio/auth";

AuthService.getInstance().setTokenAndRegion("<token>", "<region>");
When the component loads, the first check we perform is for the user’s login status using the AuthService.getInstance().userInfo() function.
This function will check if a token is currently stored in the browser and it will send a request for the user details to the AuthService.
If the user is logged in, we retrieve the user’s details. Otherwise, the function throws an error, prompting us to display the ‘Login with MetaMask’ button.
client/src/App.tsx

useEffect(() => {
    // Check if user is logged in
    AuthService.getInstance().userInfo().then((user) => {
        if (user.address) {
            getBalance(user.address)
        } else {
            throw new Error("No address")
        }
    }).catch((e: unknown) => {
        console.error("Not authenticated. Redirecting to login screen...", e)
        setData({
            address: null,
            balance: null,
        })
    })
}, [getBalance])
Let’s see how we implement what happens when the user clicks the ‘Login with MetaMask’ button. This action initiates the flow we discussed at the beginning of the article. A prerequisite step involves checking whether the user has the MetaMask extension installed. If the extension is present, it adds the ’ethereum’ object to the window property, which we then use to communicate with the MetaMask extension.
The first step is to request the wallet’s public address using the eth_requestAccounts method.
Once we have it, we send it to the AuthService and request a nonce in return.
Next, we ask the user to sign the nonce to validate that they indeed have access to this public address, using the personal_sign method.
After sending the signature to the AuthService, if it is verified as correct, the user will be logged in. The user will remain logged into the web app until they choose to log out.
client/src/App.tsx

const loginWithMetamask = async () => {
    // Check if MetaMask is installed
    if (window.ethereum) {
        // Fetch the accounts
        const addresses = await window.ethereum.request({ method: "eth_requestAccounts" })
        const address = addresses[0]

        // Retrieve a nonce for this address
        const nonce = await AuthService.getInstance().web3GetNonce(address)

        // Sign the nonce
        const signature = await window.ethereum.request({
            method: 'personal_sign',
            params: [nonce, address]
        })

        // Login with the signature
        await AuthService.getInstance().web3Login(address, signature)
        await getBalance(address)
    } else {
        alert("Install MetaMask extension!");
	}
}
Our app also has a small backend with one function which can be invoked only by authenticated users. If the method is invoked by unauthenticated users, it will throw an error and we will redirect the user to the login screen.
client/src/App.tsx

// Calling the backend method. Only authenticated users can get the sensitive information.
BackendService.hello("Friend").then((res) => {
    setSecuredInfo(res)
}).catch((e) => {
    console.error(e)
    logout()
})
Once again, you can explore the full code of the frontend here . It is straightforward React code and you can follow the comments for more information.
Backend overview
The backend side is composed of a genezio class called BackendService which has only one method hello that can be called only by authenticated users.
When a request is received, the @GenezioAuth middleware will check if the user is authenticated and if it is, it will populate the context.user property
with information about the user that initiated the request. If the client that performed the request is not authenticated, an error will be returned.
server/backend.ts

@GenezioDeploy()
export class BackendService {
  constructor() {}

  @GenezioAuth()
  async hello(context: GnzContext, name: string): Promise<string> {
    console.log("Request received from user with Public Address", context.user!.address);
    const ipLocation: SuccessResponse | ErrorResponse = await fetch(
      "http://ip-api.com/json/"
    )
      .then((res) => res.json() as Promise<SuccessResponse>)
      .catch(() => ({ status: "fail" }));

    if (ipLocation.status === "fail") {
      return `Hello ${name}! Failed to get the server location :(`;
    }

    const formattedTime = new Date().toLocaleString("en-US", {
      hour: "2-digit",
      minute: "2-digit",
      hour12: true,
    });

    return `Hello ${name}! Your address is ${context.user?.address}. This response was served from ${ipLocation.city}, ${ipLocation.country} (${ipLocation.lat}, ${ipLocation.lon}) at ${formattedTime}`;
  }
}
Deploy your full-stack app and test it live
To deploy your application, run the following command in the root directory of your project:
genezio deploy
Your app will be available at https://<custom-subdomain>.app.genez.io. The custom subdomain is specified in the genezio.yaml file.
Access it and try to login. MetaMask should pop out, asking you to sign the message. When the process is finished, you should see your balance.
Conclusion
Congratulations! You have a full stack application with MetaMask! You can check the full working code here .
From here sky is the limit. You can change the backend to do more awesome stuff than just returning a string: build a wallet alert notification system, an application that shows the historical balance data or build an auction for NFTs. Upcoming articles will cover more advanced topics and use cases so subscribe to our newsletter to not miss anything!
Subscribe to our newsletter
Genezio is a serverless platform for building full-stack web and mobile applications in a scalable and cost-efficient way.
Related articles
More from Tutorials


